Showing posts with label Recipe: Dessert. Show all posts

Thursday, July 21

Almond Tofu Dessert

What a hot day we have! I can't believe the temperature reached 101 degrees. The sun was just scorching hot. I was in need of a light and refreshing treat to cool down after such a day. Though called tofu dessert, or tofu pudding, this chilled dessert has nothing to do with tofu at all - except for the tofu-like silky texture. It is quite a popular summer treat in Asia.


What you need
:

1 pack Knox gelatin
3 Tbsp water
3/4 cup evaporated milk
1 1/4 cup water
6 Tbsp sugar
1 Tbsp almond extract

Directions:

1. Dissolve gelatin in 3 Tbsp water.

2. In a saucepan, mix 1 1/4 cup water with sugar, then add the dissolved gelatin. Stir to mix well, then bring to a boil. Continue to stir.

3. Once the mixture is boiled, lower the heat and add evaporated milk and almond extract.

4. Stir to mix well, turn off the heat, then pour into a glass baking dish, or any container. Let cool, then chill in refrigerator to set.

5. Serve with tropical fruit cocktail.


Saturday, January 15

Mango with Sticky Rice

Mango with Sticky Rice
Recipe here

Enjoy!


Sunday, July 18

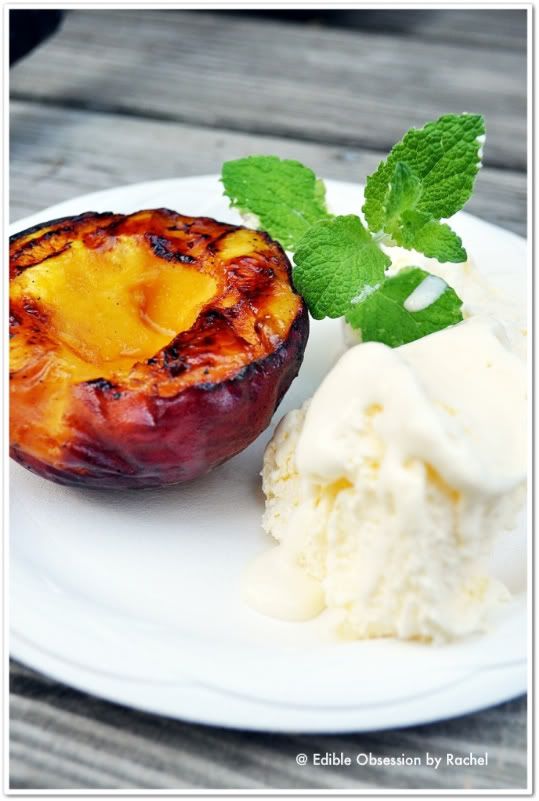
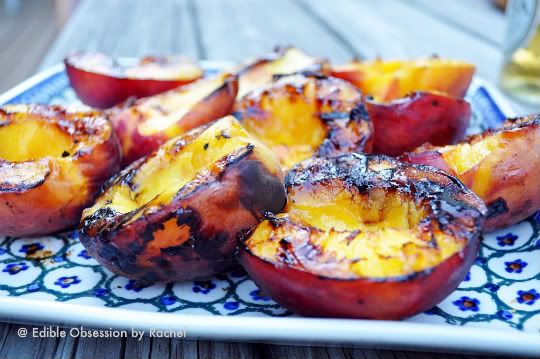
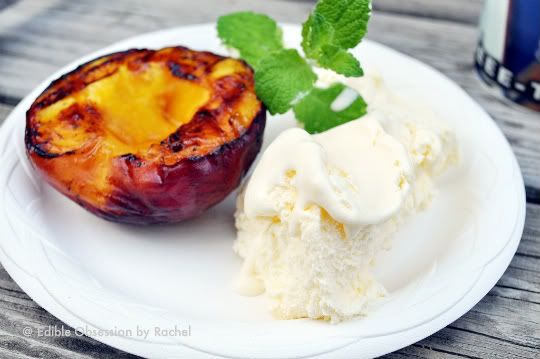
Grilled Peaches

Fruit on the grill?
You would definitely love it!

You will need:
Ripe but still firm peaches, halved and pit removed
Honey and Grand Manier, whisk together
*****
Brush peaches with honey mixture

On the hot grill, place peaches cut-side down.
Close the grill top, or cover with foil, for the best result.
Grill until caramelized and tender.

Serve warm, with ice cream.
Or with yogurt, creme fraiche, or more honey...
Use your imaginary and experiment what you like!

Thursday, May 20

Mango with Sticky Rice

I made this Thai dessert the other day.
Very happy that everyone enjoyed it!
Archive recipe is here.


Monday, March 1

Sticky Rice Pudding w/ Longan & Taro

In the mood for a Thai dessert?
Here's Thai Sticky Rice Pudding with Longans and Taro,
topped with creamy coconut milk..


You will need:
  • 1 cup Thai sticky rice (also called glutinous rice, or Thai sweet rice)
  • 5 cups water
  • 1 1/2 cups sugar (or a little more, depends on how sweet you want)
  • 2 cups peeled, cubed taro root
  • 1 can Longans in syrup, drained
  • 1 cup coconut cream, or coconut milk
  • 1/2 tsp salt


Directions:
  1. Boil taro cubes until cook through and soft. Drain and set aside.
  2. Rinse the sticky rice and put in a pot. Add water and boil until the rice grains turn clear and soft.
  3. Make sure the rice is all cooked before adding sugar. Stir gently until sugar dissolves.
  4. Add longans, and cooked taro cubes to the pot. Stir gently to mix well.
  5. Mix coconut milk and salt. Microwave the mixture for a minute or two, until salt dissolves and hot.
  6. Serve warm, topped with salted coconut milk. Stir to mix right before eating. The salty and creamy coconut milk will balance out the sweetness of the gooey rice pudding. Delish!


Use fresh Longans if available, it tastes even nicer!

I hope you love it :)

Tuesday, November 3

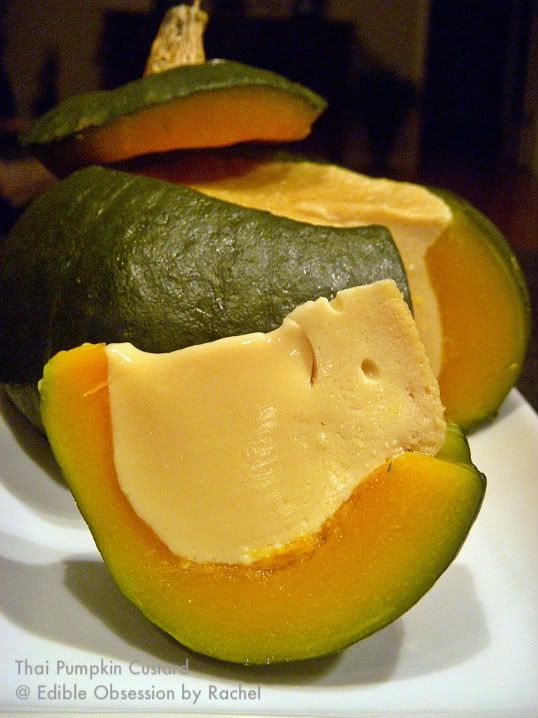
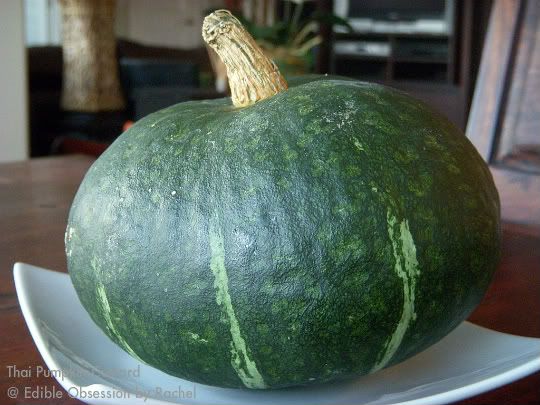
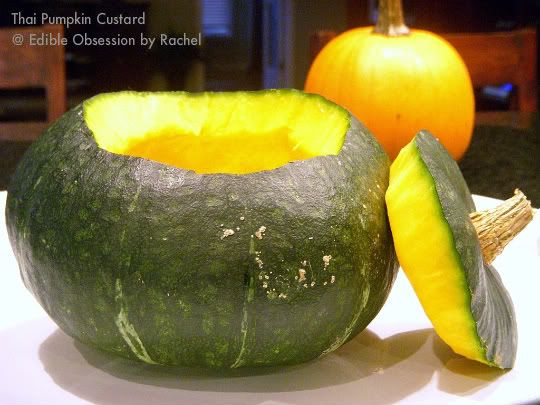
Thai Pumpkin Custard


You will need:
  • 1 medium-sized Japanese pumpkin (also called Kabocha Squash)
  • 5 large eggs
  • 1 C coconut milk
  • 2/3 C palm sugar
  • 1/4 tsp salt
  • 1 tsp vanilla extract


Directions:

1. Cut "the lid" out of the top of pumpkin. Remove and clean the seedy part from the lid and inside. Rinse and dry.

2. In mixing bowl, mix together eggs and palm sugar using a whisk. you might need to use a spatula at first, once the palm sugar get soft enough you can continue with a wire whisk.

3. Add coconut milk, salt, and vanilla extract. Stir until palm sugar all dissolved and blended well into the mixture.

4. Strain custard mixture through fine strainer, or cheese cloth. You will get a smoother custard texture when done - without lots of air pockets. Then, pour the mixture into prepared pumpkin.

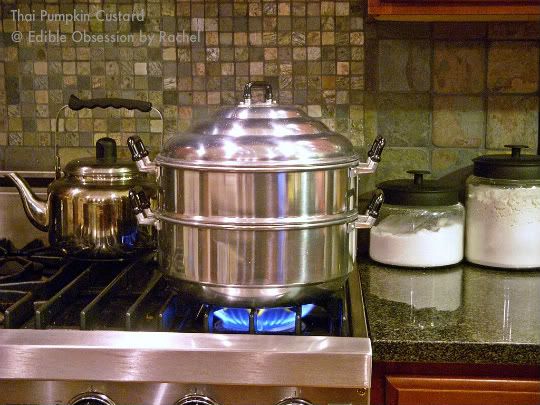
5. Bring about 10 cups of water to a boil in steamer. Then, place the filled pumpkin, and the lid, inside the steam basket. Then, set over the steamer and cover with the lid.

6. Steam for about an hour. Do not open the lid since it might cause the pumpkin to crack. So, make sure you have enough water in the steamer to start off.

7. Once it's time, open the lid and check for doneness, by inserting a skewer or a fork into the custard. If it comes out clean, the same way you check muffin, that means it's cooked through. Otherwise, continue steaming a bit longer, 5-10 minutes. The pumpkin should be soft.
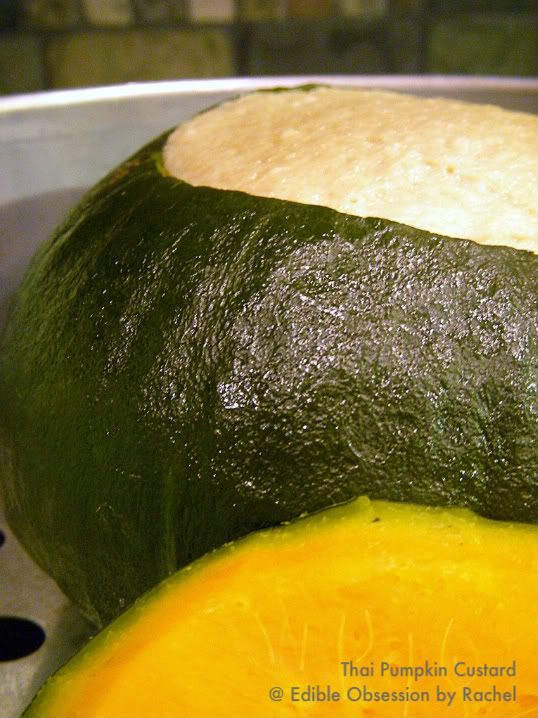
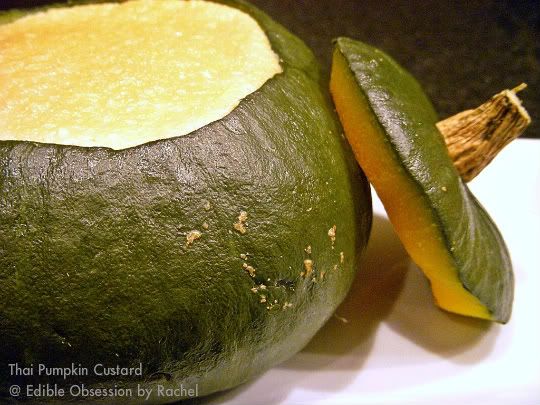
8. Once done, let the pumpkin cool down. Then, you can put in the refrigerator to allow the custard to set.

9. To serve, use a clean sharp knife cut the filled pumpkin in to wedges. The custard should be set and firm enough to hold itself. Place a piece in serving plate. The sweetness of custard will balance the flavor of the pumpkin. The skin is also edible if you'd like to eat it. Wonderful Fall dessert!

Tuesday, September 1

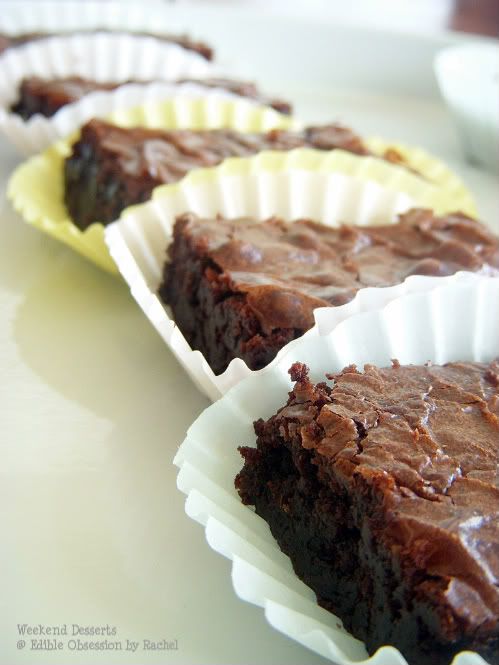
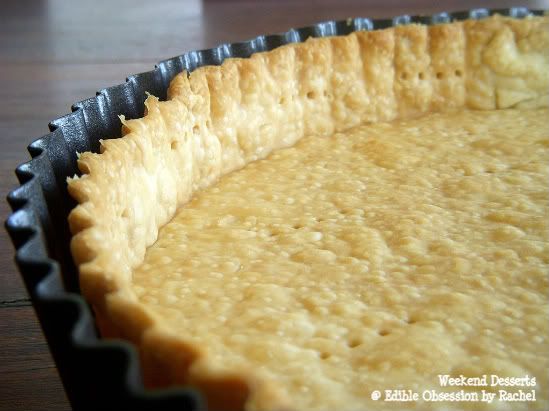
Weekend Desserts

Going to a little get-together on Sunday...,

I made some brownies for the teenagers.

And I also...

made a key lime pie for the adults.

....
....
There was a bonfire,
and of course..
S'mores.

Tuesday, August 11

Poached Pears in Red Wine

Poached pear is such a classic and elegant dessert. You can poach pears in either white or red wine. they are all very delicious. However, when poached in red wine, pears take on a gorgeous crimson blush. The jewel-like tone of their color are just gorgeous!

Here, I did half recipe. But I will explain everything with what the full recipe should be;
You will need 6 pears that are ripe, but firm, and preferably stem intact. Bosc and Bartlett pears are the best varieties for poaching. However, any firm pears would come out very well.

Those pears need to be completely and nicely peeled. Leave the stem on! It makes a beautiful presentation. Some recipes suggest coring through the bottom of pears. Here, I just peeled the skin.
Put the following ingredients in a proper-sized saucepan; 1 bottle red wine (750 ml), 3/4 cup orange juice, 2/3 cup sugar, 1 cinnamon stick, and 1 star anise. Bring it to a boil and the sugar is dissolved. Add the pear, and make sure they can be completely submerged. They will float, but there should be room for them to all be covered by the poaching liquid. Cover and lower the heat to keep it simmered. Check on it from time to time, and turn pears so the liquid can evenly coat them.
After 1 1/2 - 2 hours, pears should have a nice color like this! And they should be soft, but not mushy. Turn off the heat, and let them cool. At this point, they are ready to serve, warm or cold.
The poaching liquid tastes delicious as it is, and can be used as a light sauce (as I did here). Or you can bring liquid to a boil again, and then lower the heat to keep simmering, until thickened. Then, ta-dah! -- you have a syrup to drizzle over your poached pears.

Serve your poached pears whole, halves, or slices -- as you like. I sliced the halve and fanned it out on serving plate. Mints are great garnish. Then, drizzle some poaching syrup over the pears.

Finally, serve them with your favorite: either vanilla ice cream, mascapone cheese, sabayon sauce, whipped cream, or vanilla sauce. Pears poached in red wine have deep flavor that I really enjoy. I also love the texture and the buttery flavor of them. Can you believe how simple it is to make this elegant dessert, that could go even with the fanciest dinner party?

Tuesday, May 19

French Apple Tart


Apple pie had always been my favorite dessert.. I was searching and testing recipes, one after another, until I finally came up with the one of my own. Then, I made them whenever I felt like having apple pie, for Holidays, and for no reason at all. One day, I got sick of it.. so I moved on. A couple of days ago, I had a thought of using apple to making dessert, but not the apple pie.. I googled, and finally found something very attractive to me. It's simple, it's elegant, and it's fabulous! French Apple Tart by Ina Garten, from Food Network's Barefoot Contessa Show.

The recipe is from her cook book, Barefoot Contessa Back to Basics It was very easy to make, but looked like it came from a bakery - absolutely delicious! I decreased the amount of sugar, and used Triple Sec instead of Calvados/Rum/water, as the original recipe called for. The result was wonderful.

French Apple Tart
Recipe adapted from Ina Garten's Barefoot Contessa Back to Basics

You will need:

For the pastry
  • 2 cups all-purpose flour
  • 1/2 tsp kosher salt
  • 1 Tbsp sugar
  • 12 Tbsp (11/2 sticks) cold unsalted butter, diced
  • 1/2 cup ice water

For the apples

  • 4 Granny Smith apples, peeled, cored, and sliced 1/4" thick crosswise
  • 1/3 cup sugar
  • 4 Tbsp (1/2 stick) cold unsalted butter, small diced
  • 1/2 cup apricot jelly or warm sieved apricot jam
  • 2 Tbsp Calvados, rum, or water (I had Triple Sec on hand)

Directions:

  1. Preheat the oven to 400 degrees F. LINE a sheet pan with PARCHMENT PAPER! Make sure to use a baking sheet WITH SIDES.
  2. For the pastry, place the flour, salt, and sugar in the bowl of a food processor fitted with the steel blade. Pulse for a few seconds to combine. Add the butter and pulse 10 to 12 times, until the butter is in small bits the size of peas. With the motor running, pour the ice water down the feed tube and pulse just until the dough starts to come together. Dump onto a floured board and knead quickly into a ball. Wrap in plastic and refrigerate for at least 1 hour.
  3. Roll the dough to a sheet of 10 x 14-inches. Place the dough on the prepared sheet pan and refrigerate while you prepare the apples.
  4. Place overlapping slices of apples diagonally down the middle of the tart and continue making diagonal rows on both sides of the first row until the pastry is covered with apple slices.
  5. Sprinkle with the 1/3 cup of sugar and dot with the butter.
  6. Bake for 45 minutes to 1 hour, until the pastry is browned and the edges of the apples start to brown. Rotate the pan once during cooking. (The apple juices will burn in the pan but the tart will be fine!)
  7. When the tart is done, heat the apricot jelly together with the liquor and brush the apples and the pastry completely with the jelly mixture. Loosen the tart with a metal spatula so it doesn't stick to the paper. Allow to cool and serve warm or at room temperature.

Thursday, May 14

Japanese Sweet Potato

Japanese sweet potato, or Satsuma-Imo, is a kind of potato that is common in Japan and is now grown in the U.S. and other countries. This dark-pink to light-red skin potato has a dense, starchy flesh and wonderful chestnut-like flavor. If you love baked potato, try this roasting whole Japanese sweet potato in its skin at 400°F for about 30-40 minutes. You would totally forget about regular potato! It’s also delicious served Tempura style. In Japan, it is used to make distilled liquor called "shochu". This potato is colorful, and make a wonderful presentation.

In Thailand, there are a couple of popular ways to make dessert out of this potato; cooking in ginger syrup, and, in this post, cooking in creamy coconut milk.

You will need:
  • 2 Japanese sweet potatoes, peeled and cut into bite-size or as you like
  • 1 can (14 oz.) coconut milk ( I used "A-roy D" brand, "For dessert" kind)
  • 2 Tbsp Palm sugar, or brown sugar for substitute
  • 1/2 tsp salt
  • 1/2 C water

Directions:

  1. Boil coconut milk and water, then add Japanese sweet potatoes.
  2. Cook 10-15 minutes until the potato fresh turns yellow, and gets soft.
  3. Add Palm sugar and salt. Adjust flavor to your preference, then serve.

Tuesday, April 21

Mango with Sticky Rice

It's mango season now! You can enjoy it when ripe and sweet, or you can make smoothie, ice cream, sherbetand, and so on. For me, the best way to enjoy them is pairing it with sweet sticky rice, soaked up with coconut milk. This is an authentic Thai dessert enjoyed by Thais and foreigners.


In Thailand, the best kind of mango to use for this dish is the one called Flower Nactar (Nam Dok Mai). In the U.S., I found Ataulfo Mango, from Mexico, is the best substitute. It is quite sweet thought not as fragant as Thai mango.


The sweet sticky rice is made using long grain glutinous rice, also called Thai sweet rice. It is a kind of rice that becomes sticky when cooked, but has no gluten in it.


You will need:
  • 2 cups uncooked glutinous rice
  • 1 can (14 oz.) coconut milk (I use Aroy-D brand's "For Dessert")
  • 3/4 cup sugar
  • 1 tsp salt
  • 1 ripe mango
  • toasted sesame seeds for garnish

Directions:

  1. Soak rice overnight, or at least about 4 hours. Drain and rinse.
  2. Steam over medium-high heat in a steamer for 25-30 minutes.
  3. Meanwhile, in a small sauce pan, gently heat up coconut milk, sugar, and salt, until dissolved. Keep warm.
  4. When rice is cooked, spread out in a shallow bowl ,or baking pan. Set aside 1/3 cup of coconut milk mixture for topping later. Pour the rest of coconut milk over the rice, and fold gently to thoroughly mix. Cover and set aside for about 20 minutes to let the rice absorb the coconut milk.
  5. Peel and slice mango just before serving. Spoon stricky rice and arrange mangoes on a plate. Drizzle some coconut milk mixture on top of sticky rice, and sprinkle with toasted sesame seeds (couldn't find mine today so I used the toasted pecan bits). Enjoy!

Blog Widget by LinkWithin

Subscribe to My Posts via E-mail

Enter your email address: